Adding a swimming pool to your property is more than a home improvement—it’s a lifestyle transformation. Pools offer a place to unwind, exercise, host gatherings, or simply cool off after a long day. But turning a dream into a functional, safe, and beautiful reality requires careful planning, significant investment, and informed decisions.
Whether you’re considering a sleek modern lap pool, a lush natural pond-style installation, or a classic family-friendly backyard pool, the process is both exciting and complex. This comprehensive guide walks you through everything you need to know about pool installation—from initial planning to the first splash.
Understanding the Big Picture
Before diving into materials, costs, or contractors, it’s essential to assess your goals and limitations. Not all yards—or budgets—are created equal. Your choices should be shaped by your space, usage goals, and long-term maintenance capacity.
Start with Questions Like:
- What is the primary purpose of the pool? (Relaxation, entertainment, exercise, aesthetics)
- Who will use it most? (Kids, adults, elderly family members)
- How much space is available?
- Are there slope, soil, or drainage concerns?
- What is the ideal shape, size, and depth?
- Do you want additional features like lighting, heating, or a spa?
These foundational questions shape every step of your pool installation journey.
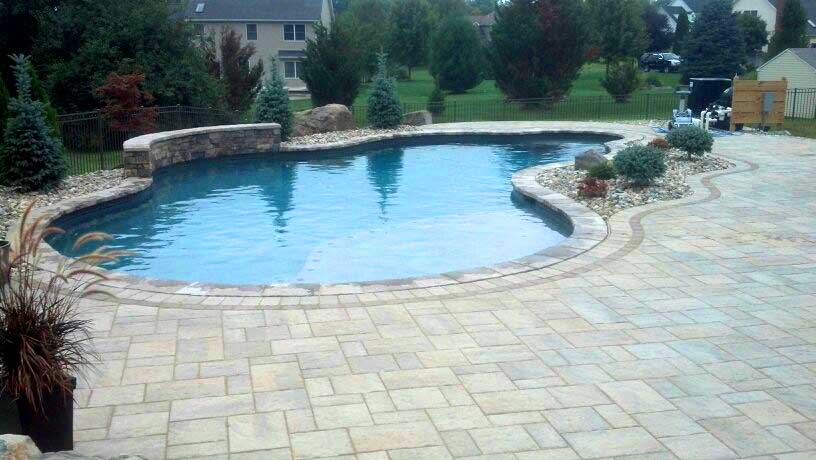
Choosing the Right Type of Pool
There are several types of pools, each with unique pros and cons. Understanding your options helps you choose what best fits your lifestyle and property.
1. In-Ground Pools
These are the most durable, customizable, and permanent options. Three main materials are used:
- Concrete (Gunite or Shotcrete): Highly customizable in shape and size. Durable and strong but often the most expensive. Longer installation time.
- Fiberglass: Pre-molded shells installed in one piece. Quick to install, lower maintenance, and smoother surfaces. Less customizable in size/shape.
- Vinyl Liner: A frame structure with a flexible vinyl sheet liner. More affordable with a soft surface. Liners need replacing every 7–10 years.
2. Above-Ground Pools
Great for smaller budgets or temporary use. Easier and quicker to install but less durable and often limited in aesthetic appeal and depth.
3. Natural and Hybrid Pools
Eco-friendly options that use plants and biological filters instead of chemicals. They’re stunning and sustainable but require more space and initial setup knowledge.
The Planning Phase
Planning is where most of the work happens. It’s also where most potential problems can be prevented.
1. Design Considerations
- Size & Shape: A rectangular pool is best for lap swimming, while kidney or freeform shapes create a more organic look.
- Depth: Shallow ends for lounging or kids, deeper sections for diving.
- Features: Think about waterfalls, lighting, spas, tanning ledges, or swim-up bars.
2. Permits and Regulations
Check with your local municipality for:
- Zoning restrictions
- Required setbacks from property lines
- Fencing and barrier laws
- Electrical and plumbing codes
Skipping this step could lead to fines or forced removals later.
3. Budget Planning
Your budget should include:
- Excavation and site prep
- Pool structure and installation
- Plumbing, electrical, and filtration systems
- Landscaping and decking
- Ongoing maintenance and repairs
Also factor in potential hidden costs: soil issues, retaining walls, utility relocation, or unexpected delays.
Step-by-Step Pool Installation Process
Once the design is finalized and permits are in hand, the actual pool installation begins. The steps will vary based on pool type, but here’s a general breakdown:
1. Site Preparation
- Marking the layout of the pool
- Excavating the area to required depth and dimensions
- Disposing of excess soil and debris
2. Forming and Framing
- Installing rebar or forms (for concrete)
- Setting up plumbing and electrical conduits
- Ensuring drainage systems are in place
3. Shell Installation
- Concrete pools: Gunite/shotcrete sprayed over rebar
- Fiberglass pools: Crane-lowered pre-molded shell
- Vinyl pools: Panels are constructed, then the liner is installed
4. Curing and Backfilling
- Concrete pools require weeks to cure
- Fiberglass or vinyl pools get backfilled immediately after placement
- Plumbing is connected to pumps, filters, and heaters
5. Decking and Coping
- Decks can be poured concrete, pavers, stone, or wood
- Coping (the border around the pool edge) is installed
6. Equipment Setup
- Pumps, filters, heaters, saltwater systems, and lights
- Electrical connections and timers
- Smart automation systems, if included
7. Filling and Testing
- The pool is filled with water
- Chemicals are balanced
- Equipment is tested for leaks, flow, and operation
8. Final Inspection and Handover
- Local inspector approves safety and code compliance
- Final walkthrough with contractor
- Owner is trained on how to operate and maintain the system
Enhancing the Environment Around the Pool
A pool is rarely installed in isolation. Its surroundings are just as important.
Landscaping
- Use pool-friendly plants (non-shedding, low-root intrusion)
- Consider privacy hedges, rock features, or themed gardens
- Install proper drainage to prevent flooding or mud runoff
Lighting
- Underwater LED lights for mood and safety
- Path lights and spotlights around the deck or landscaping
Safety Features
- Fencing with self-latching gates
- Alarms for doors or water surface
- Safety covers or netting
Furniture and Structures
- Loungers, umbrellas, shade sails
- Pergolas, outdoor kitchens, or cabanas
- Outdoor showers for rinsing off chlorine or salt
Common Mistakes to Avoid
Even with expert help, many pool projects go off course due to overlooked details. Here’s what to watch out for:
- Skipping Soil Tests: Unstable or clay-heavy soil can complicate excavation and structure integrity.
- Poor Drainage Planning: Can lead to pool flooding or property damage.
- Underestimating Budget: Always set aside at least 10–20% more than the quoted cost.
- Choosing the Wrong Contractor: Always verify licenses, insurance, and references.
- Neglecting Future Maintenance: A beautiful pool still needs weekly care.
Maintenance Begins on Day One
Once the pool is installed and running, the work doesn’t stop. You’ll need to monitor chemical levels, clean surfaces, and check filters. Whether you do it yourself or hire professionals, the care routine starts immediately after pool installation is complete.
Automated systems and smart sensors can simplify many of these tasks, sending alerts or adjusting levels in real time. Still, nothing replaces regular physical inspections and cleanings.
Long-Term Value and Enjoyment
A well-installed pool can increase the enjoyment of your home—and even its resale value. However, not every buyer wants a pool, and in some markets, it doesn’t guarantee a return on investment. That’s why your primary motivation should be personal enjoyment and lifestyle enhancement.
Still, an intelligently designed pool can offer:
- Family bonding moments
- Personal fitness opportunities
- A serene aesthetic enhancement
- A venue for social gatherings
The memories made around the pool often far outweigh the effort and expense involved in the project.
Final Thoughts
Pool installation is one of the most rewarding home improvements you can undertake. It’s also one of the most complex. With careful planning, realistic budgeting, and expert guidance, you can transform your backyard into a personal paradise.
From digging the first trench to floating on a sunny afternoon, every step in the pool installation process contributes to the final experience. It’s not just about water—it’s about creating a lasting space of joy, connection, and renewal.